Developer Quick Start
Note if you are viewing this on github, you may need to view it on Google Colab ![]()
Introduction
This Developer Quick Start guide tries to demonstrate
How to integrate
SEPTinto your existing applicationBuilding a simple Qt application that uses
SEPTand Shotgun to build output paths
Common SEPT Concepts
Before continuing with this tutorial, there are a few components of SEPT that you should be aware of.
PathTemplateParser
This is the main driver of SEPT. You will instantiate this class and pass it your template strings to validate and construct sept.Template objects from.
You can also output html documentation data from this class based on the state of Token and Operator classes configured in your environment.
Token
SEPT starts with a basic DefaultToken which will automatically resolve any Token for top level keys in your dictionary.{"name": "Alex"}, your User can use the “name” Token without you having to write any code. Your custom Token classes need to have a name attribute which is the keyword the User can type and a method called getValue(data: dict) -> str|None that resolves the correct value from the dictionary.Operator
This is a way to allow the User to mutate data from your Token classes. It’s implementation is a bit beyond the scope of this document. SEPT comes with several Operator classes out of the box.
Sample Qt Application
SEPT template and get live feedback.Token objects we expose to the user.An example of what our application will look like when you are finished is shown below:
Prerequisites
Starting off our application, we will need to install any dependencies.
[ ]:
!apt-get install -y xvfb python-opengl maim > /dev/null 2>&1
!pip install PySide2 sept pyvirtualdisplay pyscreenshot
[ ]:
import os, time
os.environ["QTWEBENGINE_DISABLE_SANDBOX"] = "1"

from IPython.display import display
from pyvirtualdisplay import Display
from PIL import Image, ImageChops
import pyscreenshot as ImageGrab


def autocrop(im, bgcolor):
    """Crop borders off an image.
        :param im: Source image.
        :param bgcolor: Background color, using either a color tuple.
        :return: An image without borders, or None if there's no actual content in the image.
    """
    if im.mode != "RGB":
        im = im.convert("RGB")
    bg = Image.new("RGB", im.size, bgcolor)
    diff = ImageChops.difference(im, bg)
    bbox = diff.getbbox()
    if bbox:
        return im.crop(bbox)
    return None  # no contents


virtual_display = Display(size=(1024, 768), color_depth=24)
virtual_display.start()
print("Display is {}".format(virtual_display.new_display_var))
os.environ["DISPLAY"] = virtual_display.new_display_var

from PySide2 import QtWidgets, QtCore
application = QtWidgets.QApplication.instance() or QtWidgets.QApplication([])


def register_screenshot(widget):
    def trigger_screenshot():
        application.processEvents()
        img = ImageGrab.grab(backend="maim")

        img = autocrop(img, virtual_display._bgcolor)

        display(img)
        widget.close()
        application.quit()
    return trigger_screenshot


def run_gui(widget):
    try:
        from IPython.lib.guisupport import start_event_loop_qt4
        QtCore.QTimer.singleShot(1000, register_screenshot(widget))
        start_event_loop_qt4(application)
    except ImportError:
        application.exec_()
Building Code
We are going to start working on our documentation widget which will be a simple QWebView with html data populated by our SEPT parser object.
documentation_widget.py
[ ]:
# documentation_widget.py
from PySide2 import QtWidgets, QtWebEngineWidgets

class DocumentationWidget(QtWidgets.QWidget):
    def __init__(self, sept_parser, parent=None):
        super(DocumentationWidget, self).__init__(parent)
        self.resize(500, 500)
        self.sept_parser = sept_parser
        self.webview = QtWebEngineWidgets.QWebEngineView()
        self.setLayout(QtWidgets.QVBoxLayout())
        self.layout().addWidget(self.webview)

    def refreshDocumentation(self):
        token_html = self.sept_parser.token_documentation()
        operator_html = self.sept_parser.operator_documentation()
        self.webview.setHtml(token_html + operator_html)
We have created a fairly basic QWidget object that contains a single QWebView that we can set the html data on from the sept.PathTemplateParserdocumentation methods token_documentation and operator_documentation.
If we want to display this widget, we can add the following code at the bottom of documentation_widget.py
[ ]:
if __name__ == "__main__":
    from sept import PathTemplateParser
    parser = PathTemplateParser()
    doc_widget = DocumentationWidget(
        sept_parser=parser
    )
    doc_widget.show()
    doc_widget.refreshDocumentation()
    run_gui(doc_widget)
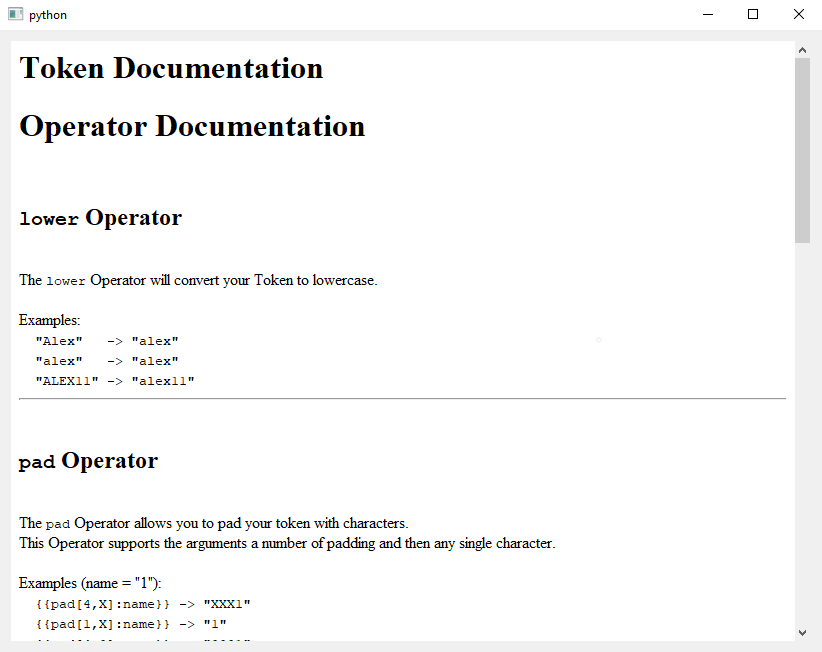
You should be able to scroll through the page as if it was a webpage (spoilers it is).
Token documentation sitting on top of our Operator documentation.QTabWidget and create a separate QWebView for each tab.QWidget to QTabWidget[ ]:
# documentation_widget.py
from PySide2 import QtWidgets

class DocumentationWidget(QtWidgets.QTabWidget):
    def __init__(self, sept_parser, parent=None):
        super(DocumentationWidget, self).__init__(parent)
        self.sept_parser = sept_parser
        ...
Now that we are a QTabWidget instead of a QWidget we should be adding our QWebView via QTabWidget.addTab instead of adding it to the layout directly.
[ ]:
# documentation_widget.py
from PySide2 import QtWidgets, QtWebEngineWidgets

class DocumentationWidget(QtWidgets.QTabWidget):
    def __init__(self, sept_parser, parent=None):
        super(DocumentationWidget, self).__init__(parent)
        self.sept_parser = sept_parser
        self.webview = QtWebEngineWidgets.QWebEngineView()
        # self.setLayout(QtWidgets.QVBoxLayout())
        # self.layout().addWidget(self.webview)
        self.addTab(self.webview, "Tokens")
        ...
Now to separate out our documentation into two tabs is fairly simple, we just create two web views and call setHtml on each of them individually.
[ ]:
# documentation_widget.py
from PySide2 import QtWidgets, QtWebEngineWidgets

class DocumentationWidget(QtWidgets.QTabWidget):
    def __init__(self, sept_parser, parent=None):
        super(DocumentationWidget, self).__init__(parent)
        self.resize(500, 500)
        self.sept_parser = sept_parser
        self.token_webview = QtWebEngineWidgets.QWebEngineView()
        self.operator_webview = QtWebEngineWidgets.QWebEngineView()
        self.addTab(self.token_webview, "Tokens")
        self.addTab(self.operator_webview, "Operator")
        self.setCurrentIndex(1)

    def refreshDocumentation(self):
        token_html = self.sept_parser.token_documentation()
        operator_html = self.sept_parser.operator_documentation()
        self.token_webview.setHtml(token_html)
        self.operator_webview.setHtml(operator_html)
[ ]:
if __name__ == "__main__":
    from sept import PathTemplateParser
    parser = PathTemplateParser()
    doc_widget = DocumentationWidget(
        sept_parser=parser
    )
    doc_widget.show()
    doc_widget.refreshDocumentation()
    run_gui(doc_widget)
You should now have a dialog that looks similar to this
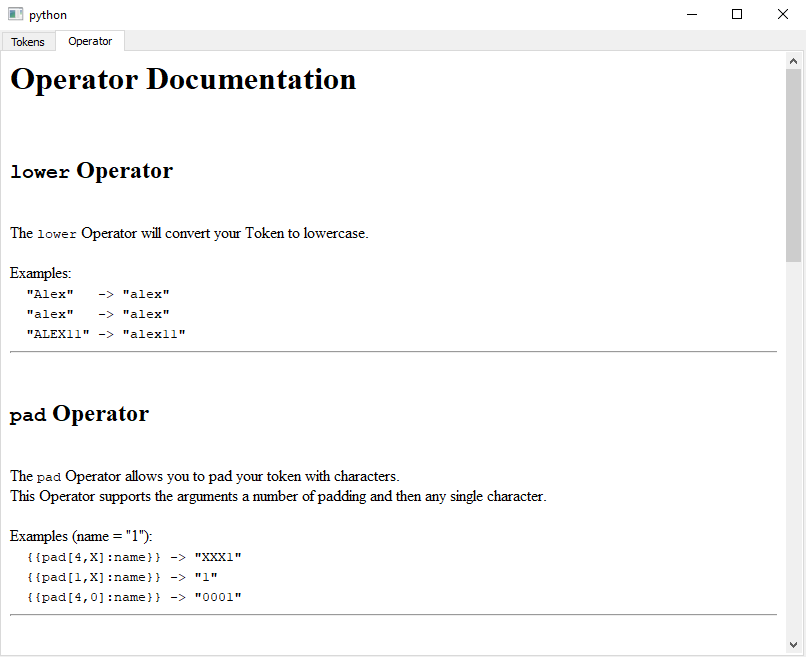
If your dialog is similar you should be ready to move on to the next step.
Our second part of this example is some widget that will render a preview of the resulting sept.Template object.
We will build this off of a QPlainTextEdit widget.
[ ]:
# preview_widget.py
from PySide2 import QtWidgets

from sept import errors


class PreviewWidget(QtWidgets.QPlainTextEdit):
    def __init__(self, sept_parser, examples, text=None, parent=None):
        super(PreviewWidget, self).__init__(text, parent)
        self.setReadOnly(True)
        self.sept_parser = sept_parser
        self.examples = examples
        self.setEnabled(False)

    def preview_template_str(self, template_str):
        previews = []
        for example in self.examples:
            try:
                template = self.sept_parser.validate_template(template_str)
                output_path = template.resolve(example)
            except errors.ParsingError as err:
                print(str(err))
                return
            previews.append(output_path)
        text = "\n".join(previews)
        self.setPlainText(text)
[ ]:
if __name__ == "__main__":
    from sept import PathTemplateParser
    parser = PathTemplateParser()
    examples = [
        {
            "Project": "HeroJourney",
            "sequence": "Battle",
            "shot": "001",
            "step": "comp",
            "version": 2,
            "extension": "mov",
        }
    ]
    preview_widget = PreviewWidget(
        sept_parser=parser,
        examples=examples
    )
    preview_widget.show()
    preview_widget.preview_template_str(
        "{{sequence}}_{{shot}}_v{{pad[3,0]:version}}.{{extension}}"
    )
    run_gui(preview_widget)
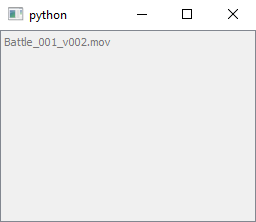
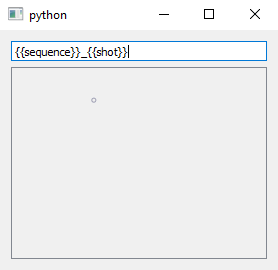
You won’t be able to do anything because we haven’t added an input text box yet.
Next thing to do would be adding an input box so that we can type our own template str in.
We are going to make a QWidget class that will contain our input widget and our PreviewWidget.
[ ]:
# preview_widget.py


class PreviewInputWidget(QtWidgets.QWidget):
    def __init__(self, sept_parser, examples, parent=None):
        super(PreviewInputWidget, self).__init__(parent)

        self.input_widget = QtWidgets.QLineEdit(self)
        self.preview_widget = PreviewWidget(
            sept_parser=sept_parser,
            examples=examples,
            parent=self
        )

        self.setLayout(QtWidgets.QVBoxLayout())
        self.layout().addWidget(self.input_widget)
        self.layout().addWidget(self.preview_widget)
[ ]:
if __name__ == "__main__":
    from sept import PathTemplateParser
    parser = PathTemplateParser()
    examples = [
        {
            "Project": "HeroJourney",
            "sequence": "Battle",
            "shot": "001",
            "step": "comp",
            "version": 2,
            "extension": "mov",
        }
    ]
    preview_widget = PreviewInputWidget(
        sept_parser=parser,
        examples=examples
    )
    preview_widget.show()
    # preview_widget.preview_template_str(
    #     "{{sequence}}_{{shot}}_v{{pad[3,0]:version}}.{{extension}}"
    # )
    run_gui(preview_widget)
However…When we type into the input nothing happens, we need to connect some Qt signals.
textChanged signal from our QLineEdit and link that to our PreviewWidget.preview_template_str method.preview_template_str a slot and then add a connect call.[ ]:
# preview_widget.py
from PySide2 import QtWidgets, QtCore

from sept import errors


class PreviewWidget(QtWidgets.QPlainTextEdit):
    def __init__(self, sept_parser, examples, text=None, parent=None):
        super(PreviewWidget, self).__init__(text, parent)
        self.setReadOnly(True)
        self.sept_parser = sept_parser
        self.examples = examples
        self.setEnabled(False)

    # Turn preview_template_str into a Qt Slot
    @QtCore.Slot(str)
    def preview_template_str(self, template_str):
        previews = []
        for example in self.examples:
            try:
                template = self.sept_parser.validate_template(template_str)
                output_path = template.resolve(example)
            except errors.ParsingError as err:
                print(str(err))
                return
            previews.append(output_path)
        text = "\n".join(previews)
        self.setPlainText(text)

class PreviewInputWidget(QtWidgets.QWidget):
    def __init__(self, sept_parser, examples, parent=None):
        super(PreviewInputWidget, self).__init__(parent)

        self.input_widget = QtWidgets.QLineEdit(self)
        self.preview_widget = PreviewWidget(
            sept_parser=sept_parser,
            examples=examples,
            parent=self
        )
        # Add our connect line here
        self.input_widget.textChanged.connect(
            self.preview_widget.preview_template_str
        )

        self.setLayout(QtWidgets.QVBoxLayout())
        self.layout().addWidget(self.input_widget)
        self.layout().addWidget(self.preview_widget)
[ ]:
if __name__ == "__main__":
    from sept import PathTemplateParser
    parser = PathTemplateParser()
    examples = [
        {
            "Project": "HeroJourney",
            "sequence": "Battle",
            "shot": "001",
            "step": "comp",
            "version": 2,
            "extension": "mov",
        }
    ]
    preview_widget = PreviewInputWidget(
        sept_parser=parser,
        examples=examples
    )
    preview_widget.show()
    preview_widget.input_widget.setText(
        "{{sequence}}_{{shot}}_v{{pad[3,0]:version}}.{{extension}}"
    )
    run_gui(preview_widget)
Token classes and demonstrate our DocumentationWidget automatically updating.[ ]:
# sept_sample_dialog.py
from PySide2 import QtWidgets

from sept import PathTemplateParser


# from .preview_widget import PreviewInputWidget
# from .documentation_widget import DocumentationWidget


class SeptSampleDialog(QtWidgets.QWidget):
    def __init__(self, parent=None):
        super(SeptSampleDialog, self).__init__(parent)

        self.sept_parser = PathTemplateParser()

        self.setLayout(QtWidgets.QHBoxLayout())

        self.preview_widget = PreviewInputWidget(
            sept_parser=self.sept_parser,
            examples=self.get_examples(),
            parent=self
        )
        self.preview_widget.setMinimumWidth(250)
        self.preview_widget.input_widget.setText(
            "{{sequence}}_{{shot}}_v{{pad[3,0]:version}}.{{extension}}"
        )
        self.documentation_widget = DocumentationWidget(
            sept_parser=self.sept_parser
        )
        self.documentation_widget.refreshDocumentation()

        self.layout().addWidget(self.preview_widget)
        self.layout().addWidget(self.documentation_widget)

    def get_examples(self):
        return [
            {
                "Project": "HeroJourney",
                "sequence": "Battle",
                "shot": "001",
                "step": "comp",
                "version": 2,
                "extension": "mov",
            },
            {
                "Project": "HeroJourney",
                "sequence": "Battle",
                "shot": "002",
                "step": "paint",
                "version": 1,
                "extension": "mov",
            }
        ]


if __name__ == "__main__":
    dialog = SeptSampleDialog()
    dialog.show()
    run_gui(dialog)

We will now modify the data so that we need to use a custom Token to provide data.
In production, you can turn off the DefaultToken and only allow Token resolving for your explicitly defined Token types.
[ ]:
class SeptSampleDialog(QtWidgets.QWidget):
    def __init__(self, parent=None):
        super(SeptSampleDialog, self).__init__(parent)

        self.sept_parser = PathTemplateParser(
            # We can pass our custom Token classes to the Parser.
            additional_tokens=self.get_custom_tokens()
        )

        self.setLayout(QtWidgets.QHBoxLayout())

        self.preview_widget = PreviewInputWidget(
            sept_parser=self.sept_parser,
            examples=self.get_examples(),
            parent=self
        )
        self.preview_widget.setMinimumWidth(250)
        self.preview_widget.input_widget.setText(
            "Name is {{lastname}}, {{firstname}} {{lastname}}"
        )
        self.documentation_widget = DocumentationWidget(
            sept_parser=self.sept_parser
        )
        self.documentation_widget.refreshDocumentation()

        self.layout().addWidget(self.preview_widget)
        self.layout().addWidget(self.documentation_widget)

    def get_custom_tokens(self):
        # We can create two new classes that inherit from `sept.Token`
        # We need to make sure that we set `name`, `getValue` and
        #   provide a useful docstring.
        from sept import Token

        class FirstnameToken(Token):
            """
            The <code>firstname</code> Token will return the "user.first" value from the data dictionary.
            """
            name = "firstname"
            def getValue(self, data):
                return data.get("user", {}).get("first")

        class LastnameToken(Token):
            """
            The <code>lastname</code> Token will return the "user.last" value from the data dictionary.
            """
            name = "lastname"
            def getValue(self, data):
                return data.get("user", {}).get("last")

        return [FirstnameToken, LastnameToken]

    def get_examples(self):
        return [
            {
                "Project": "HeroJourney",
                "sequence": "Battle",
                "shot": "001",
                "step": "comp",
                "version": 2,
                "extension": "mov",
                "user": {
                    "first": "James",
                    "last": "Bond",
                }
            },
            {
                "Project": "HeroJourney",
                "sequence": "Battle",
                "shot": "002",
                "step": "paint",
                "version": 1,
                "extension": "mov",
                "user": {
                    "first": "Alex",
                    "last": "Hughes",
                }
            }
        ]


if __name__ == "__main__":
    dialog = SeptSampleDialog()
    dialog.show()
    run_gui(dialog)
Token classes automatically added to the DocumentationWidget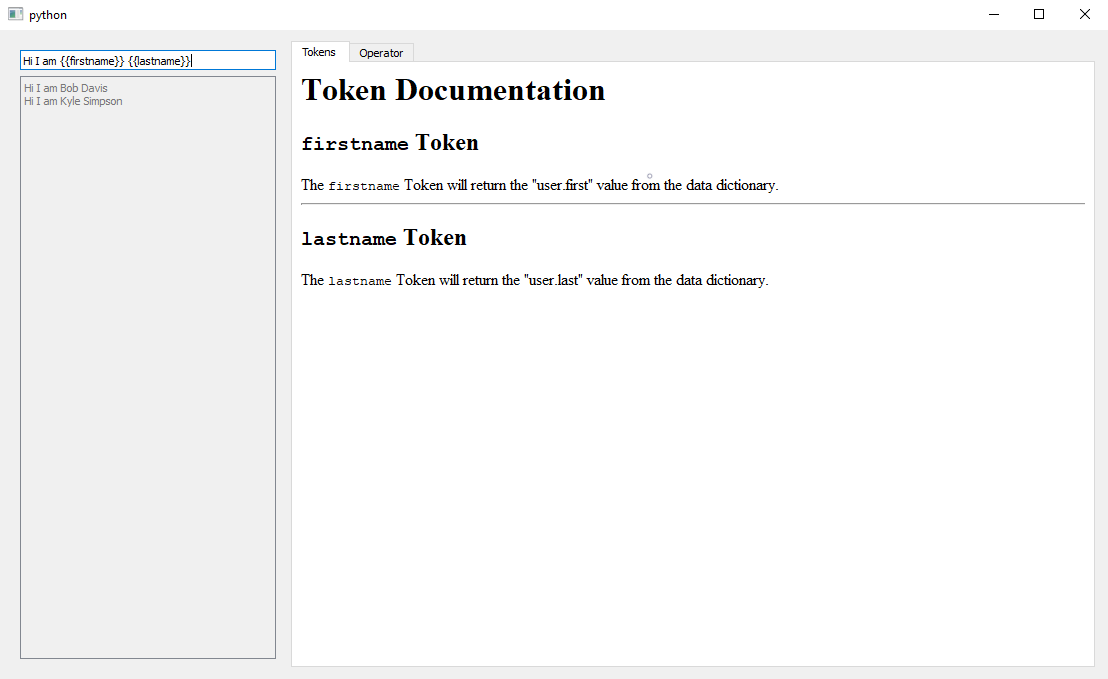
sept_qt repository, however these are simple examples of the widgets you would want to use in production.sept_qt contain additional features like helpful error messages and error highlighting.